Showing posts with label montessori sunday. Show all posts

Sunday, February 8, 2015

Montessori Sunday: Sound Cylinders

The sound cylinders are a material in the Sensorial area of the classroom. While the majority of materials in this area focus on the visual sense the sound cylinders isolate the sense of hearing (if you couldn't guess that from the name). The material is made up of two sets of 6 sealed wooden cylinders in blue and red. They contain different substances and vary in the loudness of the sound produced when shaken.

The child and adult carry the boxes to the table and line up one color in a row on the table. The adult demonstrates how to lightly hold the cylinder and shake it by each ear to hear the sound it produces. After inviting the child to try the adult says "These red cylinders are the same as the blue ones, let's see if we can match them."

She demonstrates separating out the first of each color and listening to one cylinder at a time. If they don't match the directress demonstrates how to discard one cylinder to the side and try the next of that color instead. When the cylinder do match they are placed side by side to the top left of the table. The discarded cylinders are brought back in to the line and the process is begun again. This way of matching is identical for other sensorial materials in the classroom. That means that even though it can be difficult for the child to do the process independently the first time, the skills they learn help with other materials later. Once they understand the process they can apply it to other matching activities like the smelling bottles, touch tablets and fabric swatches.

Right now most of the children in my classroom still struggle with the matching process. They can match the cylinders by their sounds, but aren't very systematic about it and so usually only end up matching one or two sets before getting bored or frustrated. One of the youngest still simply likes to shake the cylinders and marvel at the sounds they make.

And either process is fine. I don't really care if they can match the sound cylinders perfectly or not. (Though it is a good tool to help identify if a  child is having trouble hearing in general). What I want them to do is begin to refine their sense of hearing, learn that they are different degrees of sound. And as for the matching process...well I'm hoping one day it will click and they'll understand why I tried to present it this particular way. Until then they can try and make up their own systems. Maybe one will be even better.

Monday, February 2, 2015

Montessori Sunday: Golden Beads (Part 3)

Ok, so I'm a day late but the Golden Beads are just so darn useful that I can't short them now. Trust me, they do justify having 3 separate posts for themselves.

After the child finally has a solid foundation and understanding of the beads themselves, and how they relate to on another it's time to begin the basic math operations. This same material will be used to teacher addition. It'll be used to show how subtraction works. The children will multiply, they'll divide--all with the same golden beads. Now that is a multipurpose activity.

I do want to point out that the golden bead material includes both the physical beads and their matching cards. The beads are present to give the children a concrete material to manipulate, while the cards are there to show the abstract symbols that society uses. Both parts are important to help prepare the children for further mathematics work at the Elementary level. While doing the operations with the golden beads we're not focusing on whether the children are getting the right answers or not. The process of how things are done is what matters in the children's house. Having the children physically experience adding the beads together to make a larger pile matters more than what 8,932 + 6,247 equals. They can see that putting two smaller quantities together makes a larger one, so they can really understand what the process of addition is.

The idea of subtraction is similar. The children get to be a part of actually taking away a certain number of beads from a larger quantity. They can see that this process results in a smaller number then they started with.

Multiplication usually puts a grin on their faces because they have a 'secret' when they go to collect their beads and cards. (Hint: The secret is that they're all getting the same number). The children who have done multiplication before think it's hilarious and the new ones are properly shocked when the secret is revealed. It's definitely a more fun way to show that multiplication is really just the adding of the same number a certain amount of times.

Finally the children learn the process of division, which usually ends up becoming their favorite way to use the golden beads. I think it's because everything ends up 'fair' and these older children are just beginning to build up a strong sense of right and wrong. The beads are handed out from largest to smallest, with each person getting the same amount and any extras 'remaining' with the teacher.

That's what a remainder means! I remember thinking during my Montessori training. Somehow I made it all the way through high school calculus and all of college without having a real understanding what was happening with division. And I could have learned it at 5 years old.....I kind of feel like I missed out...

Sunday, January 25, 2015

Montessori Sunday: Golden Beads Part 2

Last week I introduced the Golden Bead material, one of the key Montessori materials for teaching math. This work allows young children to work with numbers in the thousands while only needing to be able to count up to 10. Pretty neat.

When Dr. Maria Montessori first came up with the idea of the golden beads she thought they would be used at the elementary level, that the younger students in the Children's House would not be interested or able to understand the idea of them. What she found though was that it was children around 4 or 5 years old who were truly interested in using these beads to convey the idea of numbers, not the older elementary children! It's pretty amazing what children can comprehend if given the right context to experience something with.


Once the child has become comfortable with identifying all the beads and cards by their names (1, 10, 100 & 1000), they can begin learning the change game. Learning this as adult even made an impression on me. I remember needing to carry over numbers in school, but didn't really have a good understanding of why. Learning to do so with the golden beads finally made it click exactly why and what was happening. Now I wish I would have just learned it this way in the first place!

The directress will have the child bring a large tray over to the supply of golden beads on the shelf and begin loading it up in a haphazard manner. Handfuls of 10's, fistfuls of units and piles of hundreds are added to the tray without much thought as to their order. At a mat the directress informs the child that they are going to count ALL these beads, usually sparking a shocked response since the messy pile looks unconquerable. To make it a little less intimidating the beads are sorted into categories.

"Let's start with the units. 1, 2, 3..." The directress shows how to count the beads one by one into a small cup. "10! Wait, 10 units? That's the same as 1 ten bar. Let's go back and exchange these." Together child and adult go and exchange the units for one of the bars of 10. And so the counting goes until there aren't enough unit beads to make into a ten bar. The ten bars are counted and exchanged in to hundreds, then the hundreds counted and made in to thousands. Finally there's only a small piles of beads left and the child is sent to fetch the matching cards to form the written number.

"That's our answer, we counted all the beads we had on this tray. Want to do it again?"

The act of simplifying this messy mountain down is a favorite with children. It seems so intimidating until they begin to actually do the process and find out how simple it is. It's also extremely important that they fully understand this concept because they will need to be able to exchange beads freely using the four basic math operations.

Sunday, January 18, 2015

Montessori Sunday: Golden Beads (Part 1)

The Golden beads...I'm not sure if there is a more versatile material in the classroom. This lovely material introduces the child to the decimal system (including numbers up to the thousands), the idea of carrying over from one category to another (such as 10 tens turn in to a hundred), and also gives the child a concrete way to preform the four basic math operation (addition, subtraction, multiplication and division).

Wow, that's a lot to get from one material, so to make this a more complete post I'm splitting it into two parts. Needless to say learning this material is a long process; children may end up using the golden beads for both their second and third year of children's house. A classroom that I student taught in did a great job as building a solid foundation with the golden beads and it was very apparent that the children had a good understanding when they progressed to later materials.

The initial presentation to the child is simply naming each of the different categories (units, tens, hundreds and thousands). Ideally the beads for this material are made out of glass, so when the child is introduced to the thousand cube there is a very distinct impression of how heavy and large a number this is. It is also convey to the children that there are 10 units in one of the ten bars, and 10 ten bars in a hundred square, and then 10 hundred squares in a thousand cube. This idea will be reinforced later with a special activity with the beads.

 From there the children begin fetching certain quantities of the numbers. For example: "Bring me 5 10's.No that's not a typo, I said "5 10's." The child may not have mastered the formal names of numbers yet (such as twenty, fifteen, etc.) but they can count to 10, so why should we hold them back? Yet another reason why the English language makes education so much harder!

As the child get competent they are asked to get more and more numbers until finally they are fetching from all four categories (ex. Get me 3 thousands, 4 hundreds, 5 tens, and 6 units). How's your memory feeling? I know that I sometimes forget what number I've sent them for!

Around this same time the child is introduced to the decimal cards, which are introduced the exact same way as the beads. The children also learned to recognize the cards by fetching them, and eventually work up to getting four cards at once.

Finally the beads and cards are combined and the child's memory exercised as they are asked to get numbers such as 6,592 with both the cards and beads. This can take children weeks to months to master, but it's a vital step to make sure they understand and can remember these large numbers because the next step is doing math problems with them. 

Yep, we teach children how to add, subtract, multiply and divide using numbers in the thousands. None of this silly single or double digit stuff for Montessori children....ok, ok so it sounds like bragging, but is it really all that tricky when all you need to do is be able to count to 10 and remember the names of the categories?

Sunday, December 21, 2014

Montessori Sunday: Sandpaper Letters

I was trying to decide which material to highlight when it occurred to me that I hadn't yet showcased the sandpaper letters. I think it was my Montessori trainer who said that if she had to set up a Montessori classroom with only a few of the real materials it would be the sandpaper letters, the moveable alphabet and the golden beads. So obviously the sandpaper letters are of great importance.

The sandpaper letters are just what they sound like; letters (ideally cursive) cut out of sandpaper and mounted on wood. The consonants are mounted on pink and vowels in blue, which matches the scheme of the moveable alphabet that the children will learn to use next.

Using the sand tray to practice
forming ta cursive 'o'
(like in ostrich and on)
They are first presented to the child around 3 years old, when they begin to show interest in identifying the sounds of words. The directress will usually first introduce the letter that child's name begins with, as well as one or two other common sounds (like t, s, or b). The child is shown how to trace the letter with the pointer and middle finger. Near the end of the tracing the directress will say the sound of the letter, not the name. The child is invited to try and the sound is repeated. Together child and teacher think of some words which begin with the sound, and then move on to the next letter. Once the child has been introduced to all 3 letters a three period lesson is began, where the directress gives little commands to help reinforce the sounds that go with each symbol. Ex. "Trace 'c'", "Tap 's'", etc. At the end of the lesson the child is asked to trace each letter a final time and asked "What sound is this?"

Obviously is takes a long time to get through the entire alphabet of 26 letters, so it is important that the sandpaper letters are used often so ensure the child has a solid foundation to begin writing later. Because English is such a non-phonetic language there are also sandpaper letters for the more common phonograms in the language (ch, sh, th, etc.).

The reason the sound of the letter is introduced, rather than the name is to ease the child in to writing and reading easier. Knowing the sound 'b' instead of the name B, helps the child know what symbol make the 'b' sound in "ball", rather than having to go through the extra step of translating the sound 'b' into the name B and then trying to recognize the symbol.

Cursive is preferable for the same reason of making later writing easier. With cursive letters all the symbols are distinct, it's much harder to mix up b, d, p, and q when they are written in cursive script. The motion of forming cursive letters, with it's continues curves and loops, is also a more natural hand motion and so is easier to young children to follow. It also helps prevent letters being written backwards and upside down because there is a natural flow from the starting point.

All of this in one single material in the classroom. Those sandpaper letters are so important for later work...now I feel  like I should be working with them even more in the classroom!

Sunday, December 7, 2014

Montessori Sunday: Classified Cards

This week's Montessori Sunday focuses on the classified cards, or as they are sometimes called, 3 part cards. These picture cards are in the language area and help build up the child's vocabulary; both in spoken language and later in the area of reading/writing. Each set of cards usually has a common theme, such as fruits, farm animals, kitchen objects, etc. This is done to intentionally introduce children to the idea of classifying objects based on their similarities.

The cards are sometimes refereed to as three part cards because they are commonly made having 3 separate parts including: a card with a picture, a label that matches the picture, and a third card with both the picture and its corresponding word (called the control card). For a child who is reading they can spread out the pictures, find the corresponding label and then check their work with the control cards. This allows them to build their reading vocabulary. The label must match one of the pictures and so even if the child isn't able to completely sound out a word, they have a certain context in which to guess based on the parts of the word they do recognize. The matching control card allows the child to be independent in checking themselves, a key part of being a Montessori child.

Spoken language cards for different farm animals
My Montessori training presented the making of the cards just a little bit different, though how they are used is identical. We were taught to make 3 sets of cards. The first set is simply the cards with pictures on them. The second set is the pictures with corresponding labels that are separate. The third set is a card with the picture and corresponding word both. This allows there to a be a set of cards for children who cannot read yet, as well as a separate (though matching) set for a child who is ready to read the words and label the pictures.

The previous classroom I worked in had only the original 3 part cards and the younger children where forever getting out the labels and control cards as well as the picture cards I would be trying to use with them. This led to a lot of lost labels and bent cards that frustrated the older children who wanted to use them for reading. A minor change, but in my mind well worth the extra paper, ink and laminate to have an extra set of the cards just for spoken language.

The children in my class really enjoy fetching the cards. They'll spread the cards out at a table, then come over so I can tell them which card to get. They're all pretty good with the fruit cards we have, but for something more difficult (like dinosaurs) I'll often get out the matching control cards so I can show them the picture of what I'm asking for. Then when they return with their card I'll ask them to tell me what they brought, and supply the name if they've forgotten. Once they get more practice I'll be able to just tell them the name of the card and they'll have to go and find it without looking at the picture. Then when they return I'll flip over my copy of the card and have them check if they match.

They like this little game so much that they've started doing the fetching with another classmate if I'm not available. They usually don't know the name of what they're sending the other child to get, but it's a good opportunity for me to see which ones they really do know!

Sunday, November 30, 2014

Montessori Sunday: Spindle Boxes

It's been so long since I did a post on a specific Montessori Material that I had to go back and check what I haven't already posted about. So today's post is going to be about the Spindle Boxes because A) I haven't done them before and B) because I just recently showed them to a child in my class.

The spindle boxes are one of the earliest math materials children are exposed to in the classroom and are supposed to convey the idea that numbers mean a specific quantity of something. They are shown after the child has had practice counting the number rods (which are units that are bound together so that 5 is always 5 and you can't accidentally drop any parts to make is 4) and is comfortable identifying written numbers. The material is made up of a shallow box divided into 10 separate compartments. The numbers 0 to 9 are written in the space above each compartment. There is also a container with exactly 45 spindles in it.

The adult double checks that the child is familiar with the printed numbers and then begins demonstrating how to count out the desired number of spindles, beginning with 1. Each time the spindles are counted into the hand first and when the correct number is reached then the spindles are counted again in to the correct compartment. 
When the compartment for 9 is filled all the spindles will have been used, creating a built in control of error for the child. If they haven't counted correctly their will either not have enough spindles for the last box, or there may be some extras left over. 

Once all the spindles have been counted the teacher introduces the 0 compartment. "This is zero, zero is nothing so we don't put any spindles in here." The teacher then demonstrates how to bind the groups of spindles together and place them back in their compartments. This binding is done to show that the number is the whole quantity grouped together.

That's it. A fairly straightforward activity that introduces the child to the idea of 0, careful counting of objects, and double checking of work (by counting the spindles twice). I really miss the spindles from my training class, they were like old fashioned sewing spindles, smaller and smoother than the current type and just felt so much nicer in the hand. They were also smaller, I found that when showing my classroom set to C that he had trouble grasping the spindles in one hand as soon at the quantity was any higher than 7. This makes binding the spindles together even more difficult; how are you suppose to bind something that you can't even hold in one hand, what hand do you have to use then? So I'm currently brainstorming ideas on how to complete this part of the lesson. I'll let you know how that turns out.

Sunday, November 2, 2014

Montessori Sunday: Celebrating Holidays

Ok, so how to celebrate  a holiday isn't exactly a Montessori material in any regard, but it is something that is approached a bit differently and since I didn't get to talk about our 'visitor' on Friday I'll do it now. There usually aren't 25+ copies of the same art project made by the children displayed around the classroom. Bulletin boards aren't updated with the usual holiday colors. Though there are some similarities though that seem prevalent in every preschool environment. Special songs and stories surrounding the season are shared with the children. Also, the diversity of holidays (especially around the winter season) is introduced with the idea of exposing children to many different points of view.

Here's how our All Hallow's Eve 'party' went as an example. Our class has spent two days preparing a jack-o-lantern. The children helped gut the pumpkin, then sorted the seeds from the flesh to save for a snack. The next day they each drew a part of the jack-o-lanterns face and I carved it out. I also set the seeds out on a table to dry and the children were very excited to remember that they were going to be our snack on Halloween.

On the day of Halloween I waited for all the children to arrive before asking them to put their work away and wash their hands for a special snack. While they did so I darkened the room. Together we passed out napkins and the roasted seeds, as well as some warm apple cider from our Fall Festival the weekend before. The children were very careful with being allowed to eat on the carpeting and were very careful and neat with their snack.

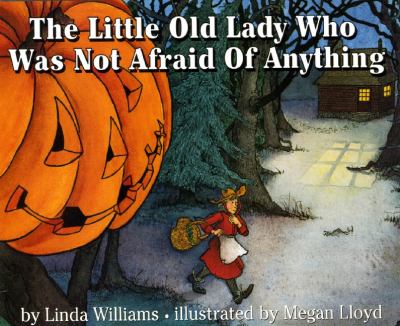
I lit the pumpkin and read one of my favorite Halloween stories, "The little old lady who wasn't afraid of anything." The children munched on their pumpkin seeds and enjoyed their apple cider as the jack-o-lantern flickered and I read the silly story to them. They were so attentive and well behaved that I wish I had a video of the event. When I finished the story the candle was blown out the children who were done took care of their dishes and napkins before getting back to work. They all agreed they wanted the Jack-o-Lantern to visit our classroom for the rest of the morning so I left him out for them to admire at leisure. Then I sat and enjoyed my own snack with the stragglers and that was it. That was our entire Halloween.


There was no big hoopla about candy. No tears and uncontainable excitement around costumes. Just a peaceful snack with friends and a silly story in a slightly spooky setting. Then they were done and over it. I didn't hear another word about Halloween for the rest of the morning. They were content with what we had. I only hope we can do it again.


Sunday, October 26, 2014

Montessori Sunday: Having Snack

In our classroom having a snack is no different from any other work. There's a specific set of steps that need to be followed, the children can choose to have it whenever they like (though only once!) and when they finish things need to be cleaned up. This week, the snack routine got a bit more complicated.

Since the start of the year the snack in our classroom has been set out in individual Dixie cups, one for each child. I demonstrated to all the children how to wash their hands, choose one snack, enjoy it and then clean up the table when they finished. Now to an adult that seems like a simple process; however to the child it requires a huge effort of self control. Not only do they need to wait their turn to have snack (we had only one chair at the snack table), they also need to resist the desire to take more than one cup (or muffin as the case was one day).

Since my class right now is so small it was very easy to monitor the snack area and make sure the children were following the rules, especially the hand washing beforehand. After a few incidents of extra snacks eaten, some dumping of water back into the communal pitcher and lots of practice with washing hands, I decided they were ready to begin dishing their own snack.

Now our snack area boasts a 'Menu' each day. The children need to 'read' it and take the correct amount of snack to put on their plate. They use tongs or a spoon instead of their hands to dish out the food. When done, they are responsible for washing any dishes and putting them in the sanitation bin.

Now, having the food out like this does make it more likely to have germs spread than handing out individual cups. But the learning process and development of self control far outweighs this slight problem. After all, that's why we spent the first two months of school building up to this point. The children had already proven themselves worthy of the trust to keep this area clean and healthy for everyone. If we welcome any new children to the class I may have to reconsider whether this current set-up will work or if we'll need to go through a period of limited snack freedom until they can settle in.

Currently though, my students love being able to use the 'menu' and dish their own snack. They are also very proud of having real dishes to be responsible for. They can choose to use a bowl or plate for the day, and I also have spoons and forks available. They don't usually need silverware, but sometimes enjoy using it anyays.

Then, to make snack even more of a challenge- I turned the table and added another chair. Snack with a friend. Done partly to satisfy the logistics of having some slow/thorough eaters and to encourage some social interactions. After all, it's fun to eat with a friend!

What's better than cheese and pretzels? Cheese and pretzels with a friend!

Sunday, September 7, 2014

Montessori Sunday: The prepared environment (tour edition!)

I've previously written about the importance of preparing the environment in these posts- http://thepointsofdeparture.blogspot.com/search?q=prepared+environment

This post is slightly different as it really showcases how this may look in the actual execution. Of course every classroom is highly varied based on the furniture and space alloted to the teacher. I'm actually quite curious to see how much my own classroom changes over the course of even just this year!

Introductory shelf, including puzzles, bead stringing,
fruit matching, a lock and key, and lacing activity.
There are also some cleaning things as this shelf is
next to the sink and space where the brooms are hung

Cleaning area, including child sized mop, broom,
dustpan and brush for the table and floor

Sink with soap and towels for washing hands.
Underneath are some cones to mark off wet areas and
some towels for wiping up spills on the floor.


Dish washing stations. There is a tub for soapy water, one for rinsing
and the drying rack in to the right on the sink.
The shelf below has a tray for the dirty dishes (they wash one thing at a time),
extra soap and sponge cloths, as well as two bins for 'clean' dishes
that are used to transport things to the dishwasher at the end of the day.

Food preparation shelf.
The activities with orange apron involve making food.
The upper shelf holds some materials
for arranging flowers and caring for plants

Flower arranging station and dressing frames.
This old desk is taller, allowing the children to stand
while they trim flowers and arrange them in vases.
Currently only a few dressing frames are available,
when the stand is full it will need to be moved so
the children can reach all the frames easily.

Snack area.
Here we have a hutch with all the snack supplies.
Currently the snack is already pre-measured in dixie cups
but as soon as they are more trustworthy the children will dish their own.
The fridge currently hold extra snacks (to keep them from being
contaminated by eager fingers) as well as halved oranges and
slices of lemon for  the food activities.
The drying rack for wet cloths and art work
(please note that I had removed all the extra clothspins at this point,
usually the children use 6 or 7 for each little cloth!)

Our snack table.
The children have a cross stich picture to admire
and can also observe part of the garden from here.
Later in the year This table will be set for two children at a time.
 
Resupply shelf for spills cloths, aprons & oilcloths


Custom built stand for cloth washing (thanks mom and dad!)
Chalkboards and my observation stool.
From this spot I can easily see  most of the classroom to take notes.
There is also a chair for the children to sit by me if they need or want to.
Spoken language shelf.
This shelf is also a work in progress and will grow as the children progress.
Currently sound game objects and sandpaper letters are displayed on top
while spoken language cards, some poetry books and biological activities are below.

Library area
I already gave the children a special presentation
on the treatment of  public library books.
So long as they're respectful we have an endless supply
of great literature from the local library!

Flags with land and water forms.
This stand is actually for the puzzle maps,
but as we will only be using one this year I have re-purposed
them to hold the materials for teaching about
islands, lakes, peninsulas, etc.

Sensorial Shelf 1 (back)
I was so excited to find this little table for the red rods!
The child haven't yet had trouble reaching the cylinder blocks on the top shelf,
even with these other stands in the space, but I'll keep watching.

Sensorial Shelf 1 (front)
This has mainly visual materials, including the two cabinets
for geometric shapes, and botany

Sensorial Shelf 2
This shelf has more of a mix of materials for different senses.
On the shelf behind it (currently turned backwards as the children
aren't ready for the materials yet) holds more geography works.

Practical Life Shelf (water works)
This is the biggest shelf in my room and will probably be rotated
throughout the year. Currently the top has easier exercises like simple pouring.

Sewing Activities
This is one of the few shelves that probably wont' have much rotation.
There is an introductory sewing activity, a needle threading work, button
sewing, and a running stitch work. All can be modified slightly to add difficulty.

Art shelf
This shelf has definitely gotten a lot of use already!
Most of the basic activities will remain out all year,
though they will be changed up by adding different colors,
shapes or textures to work with. 

Polishing shelf
All the montessori polishing activities are here,
as well as a basic folding activity and grace and
courtesy cards.
Sometimes it's where things fit, not where they make sense!

The Peace table
Haven't had to use this yet thankfully!
But eventually it will serve as a quiet space for the children
to meet and talk their problems out.
When they solve it they can ring the bell together.

Student bins
Obviously there's some room to expand here!
On top of this shelf are some objects for polishing,
dusting cloths, our 'sun' for birthday celebrations,
and (a class favorite!) our bead string for counting the days.

Wednesday, August 27, 2014

Montessori Sunday: Art Activities

A little late but here's a brief look at art materials in the classroom.

Maria Montessori often pressed teachers to provide "the best for the smallest", meaning that we shouldn't give children tools that were inferior to adult versions. Instead she wanted to ensure they could experience the best materials possible. That could mean giving them a child sized rack with a wooden handle that won't bend like the plastic ones which are more common.

She also wanted children to be exposed to more than watercolors and crayons that are the staple of most preschool rooms today. Her books talk about giving children real clay to build small sculptures with, and oil based paints to explore with. Montessori wanted to have children learn how to sew with real, sharp needles (that are sometimes very hard to thread for such small fingers!).

The art aspect of Montessori isn't often included when most people sum up the Method to others. I think it's because of the big cultural shift away from art education in general. Of course in the classroom there are lots of opportunities for children to be creative beyond the art materials, but I'd like to focus on the actual art works today.

Currently on my shelf for the new three year old students I have-
My homemade rubbing blocks. 
The green is very rough sandpaper that is mounted on 
pre-cut wood blocks from the local craft store.  
The child places a piece of paper on top of the shape 
and rubs over it with a crayon to make the image appear.

  • Drawing with colored pencils
  • Simple cutting paper for scissors
  • Modeling clay
  • Pasting pre-cut shapes
  • Rubbing with crayons
  • Watercolor painting

As the year goes on I'll update some of these activities (like adding different papers to the scissor cutting), while others will be rotated out and replaced with more challenging work (such as exchanging the pasting activity for a paper making work).

I'm thinking about doing a winter and spring themed art activity as well when the time rolls around, but don't want to focus too much on the holidays and seasons. I previously worked at a school that tried to do a different type of art project each week to follow the theme. It was far too much work. A lot of prep time on the part of the adults and a lot of time spent nagging each child to make sure they had a completed project to bring home. It wasn't very Montessori and I just didn't like doing it. I also noticed that the children who were really interested finished their project right away and wanted to do another (though they couldn't because we didn't have time to prepare extras). Meanwhile the children who weren't enthusiastic would drag their feet and avoid the art project.

I'd rather have a situation like the one that happened in the classroom last year. We had a work where the children cut the parts of flowers out of paper and glued them together. All the children were very interested when we first put the work on the shelf, but after a bit only a few children were interested. But these children were extremely interested in cutting out those particular shapes and putting them together. So much so that they made several each day for days on end.

The end result? Most children just brought home 1 or 2 paper flowers, while a few brought home dozens. I feel like the parents got a much better idea of what their children ACTUALLY liked to do, rather than what they were being forced to do.


Sunday, May 18, 2014

Montessori Sunday: The Prepared Environment (part 2)

This is slight continuation of my earlier post about the prepared environment. Like I said in that post, it is a huge topic (trust me on this, I wrote a 20 page paper on the subject and still only hit the high points) so I thought it deserved a second post. Last time I focused on the arrangement of materials and how this made it easier for the children to navigate the room. This weekend I want to really delve in to what it means to have things be child sized and accessible.

Child sized seems obvious. Most preschool provide chairs and table that are small enough for children to sit at properly. They often provide hooks or cubbies that are also at the child's level. Montessori does all this and adds having all the shelves be sized for the children. One will not likely find high shelves containing things for adult use only, rather everything will be at least within reach of the average 6 year old.

A Montessori room will also have a sink (or 2!) down at a level the children can reach for themselves. Ideally each classroom will have a bathroom in it, or at least very near by, that contains a child sized toilet and sink. Windows will go down almost to the floor so even the youngest child can look out without stretching.
Photo Courtesy of Montessori Services

Beyond these physical components though, a Montessori guide will ensure that all the objects in the
room can be handled by the child. A job concerned with pouring water will contain a pitcher that is the right size for a young child's smaller hands, not an adult. Cloths for wiping up spills will be small enough for the children to fold neatly and wring out if they get too wet. All the dishes for preparing and eating snacks will be smaller than normal, and light enough for children to carry easily.

The standard Montessori materials available for purchase are obviously designed for use by children, though it is still up to the guide to make sure there are appropriate trays and/or baskets to store and carry them in.

Child sized might also be re-interpreted as child accessible. A pitcher with too tight of a cap is not useful to a child because they cannot refill it themselves. Beads stored in a container that requires adult strength to open is simply asking for children to try themselves and either fail or create a huge spill. Aprons for activities obviously need to be sized for the child, but it important to have Velcro or snaps rather than the standard ties because most younger children are incapable of tying bows on their own yet.

Of course having something be child sized is not always an option. Doors need to be of normal height for safety reasons (and the comfort of the adults who need to use them!). While some well planned schools may be able to have two doors to solve this problem, most will not. Instead the doors should be light enough for children to push them open easily, with handles that turn easily for smaller hands.
Light switches may also be out of reach of children and should have extenders attached to them so children can independently turn the lights on and off.

Most important to preparing the environment for children though is to observe them using it. Simple things like angling a shelf or swapping out a tray for a basket, can make a huge difference in accommodating children's development.

Sunday, April 27, 2014

Montessori Sunday: The Prepared Environment


"The things he sees are not just remembered; 
they form a part of his soul." 
Maria Montessori

So this Sunday instead of talking about a specific material I'm going to highlight the importance of the Montessori prepared environment. It is a HUGE topic, so this week I'm only going to focus on the arrangement of materials.

Like other preschool settings Montessori classroom have furniture that is child sized but it goes beyond the normal daycare. It's not just tables and chairs that are small, but the shelves, the handles of the faucet, the knobs on the door, and just about everything else is meant to be in reach of the children. Yes, this means that it is very likely children may take out a material they are not yet ready to use. That's ok. We want them to learn restraint against temptation and impulse. It also means that they do not need to wait for an adult to assist them. 

Imagine how frustrating it would be if each morning you needed to wait for your boss to provide you with your keyboard before you could get started for the day. And then when you make a typo you need to go track down that same boss and ask them for the key for the backspace button, which they then took back as soon as the typo was fixed. (Actually this sounds a lot like my days as a lowly cashier at a chain bookstore....but that's another blog....). This is basically what happens in a typical preschool setting. A child may want to do an art project but the supplies are kept out of reach and the teacher is the only one who can use the glue. The child is kept dependent upon the adult to provide them with the things they need. 

Cleaning paint off the floor by the easel.
Paint is kept at the easel all day, along with a spray bottle
to wet the watercolors as they dry out
In a Montessori classroom all these things are kept not only where the child can reach them, but they are also shown how to use them. Scissors are introduced, complete with small papers to practice snipping on, and more complicated lines when the child has mastered the basics. Pasting is an activity all it's own, and while the container of paste may be small to prevent the child from going completely overboard, it is always available and refilled when necessary. 

These preparatory lessons make it so the child can successfully complete a more advanced project. A perfect example is out in our classroom right now. This flower art involves the child cutting out the stem, soil and flower from three separate pieces of paper and then gluing them together. There was one little girl who really wanted to do this work, but wasn't well versed in scissors yet that we could direct to the earlier scissor work and let her know she needed to practice that first.

The entire classroom is situated this way, and in fact the materials are even arranged on the shelves in order (especially in the math and language area) so it is easy for the child to see what they need to learn and practice before advancing to the next thing. The classroom space is also divided into four basic areas (practical life, sensorial, language and math). This division helps the child classify the types of activities, and can help the newer children become more comfortable in the classroom because most of their activities are located in one small area of the room.

A fabric wall hanging adds a colorful touch to a bare wall
(thanks mom!)
The materials of the classroom though do not just refer to the activities though. The furnishing of the room are also an important part of the environment. Montessori advocated that not only should all the items be sized for the children, but also be light enough for them to move and re-arrange as needed. She also said that the objects in the room should be in good repair and beautiful, so the children would be better able to sense their value and respect them. A table covered in nicks, scratches and pencil marks doesn't encourage a child to keep his pencil on the paper. A pristine table on the other hand will violently show up the same errant pencil and demonstrate to the child the consequence of actions.

And this furnishing goes beyond the necessities of teaching, to beautifying the classroom. Dr. Montessori came to realize that children could love and appreciate fine artwork and decorations and so she put them in the classroom. Their purpose was to expose the children to the beauty of the world, and to make the environment feel more home like and of greater importance to them. It was these small additions and attention to detail that teaches the children what respect for the environment means, and instills in them a desire to create lovely spaces.


Sunday, March 9, 2014

Montessori Sunday: Table Scrubbing

So I know I've done this activity before, but it's a good one! Plus this time I have two stories to go with it!

Table scrubbing is in the area of practical life, meaning is is usually introduced to younger children. However, because it's  a longer process and is usually pretty messy, it's necessary to make sure the child has mastered some other presentations first. Especially the act of pouring water!

Possible set up for table washing
With table scrubbing the guide helps the child put on an aprong and find a table that needs to be cleaned. The child will bring a small chowki next to the table to put the materials on, and move the chair to the side. The bucket with materials is brought over and the child is given the name of each object. In this case there is a basin for water, a scrub brush, a bar of soap, a sponge, and cloth for drying. There may also be a bucket to empty the basin in to, but in our classroom the basin has handles so we use just that.

The guide has the child fill the pitcher with water and empty it in to the basin, until there is enough water to wet the brush. The child is shown how to apply a small amount of soap to the brush and then the washing begins. The guide demonstrates how to move the brush in circular motions, starting at the top left of the table (the same place you start writing on a piece of paper!). After the whole table has been scrubbed, the sponge is wet and the guide draws in a slow strokes across the table, showing the child the collected soap. The sponge is rinsed as needed, and the teacher draws the childs' attention to the process of squeezing out the sponge. (I feel  like quite a few of our children have missed this part!). After all the soap is wiped up the table is dried with a small cloth, again using circular motions.

Now the materials for table scrubbing make is pretty obvious what the activity is for, that's actually part of being a practical life material: the purpose is clear to the child. In fact it's so clear that S decided she wanted to take it out, even though she hasn't had a formal presentation she figured she knew enough about it. She put on her apron, got a chowki and took the bucket out. She brought the pitcher to the sink and filled it up.

Then she dumped it into the basin....with everything else still in there. Ooops! While the purpose may be obvious, the proper presentation is still important. Eventually I saw that she had way too much water on the table and noticed everything floating in the basin when I went to help her out. I asked if she needed help and S (who is normally very shy and does not like to talk at all) nodded vigorously. Together we dried all the water up and went back to the beginning of the activity to begin a proper presentation.

A vigorously scrubbing a table, note the blurred hand motion!
Table scrubbing is an activity that involves the child's whole body. They stand while doing it, and the act of scrubbing across the table engages a lot of muscles. As a result it's a very calming process, and if the child is focused on the activity they may end up scrubbing the same table over and over again!

Fortunately table scrubbing is also a potentially messy process. Yes, I said 'fortunately', not 'unfortunately'. After all it's just soap and water. Spills can be wiped up, clothing can be changed, and the child can learn to be more conscious of their movements and the consequences of those same movements.

Take A for example. She is a child who is always in a rush. She's the one we are constantly reminding to walk. She always wants to know what everyone else is up to, and constantly leaves her own work out to investigate. Table scrubbing is perfect for her. She gets so involved in using her whole body to move that brush around that she isn't distracted by anything going on around her. Well...usually. She also is in such a rush that she forgets to squeeze out the sponge. In fact she forgot this part so much the last time she scrubbed a tablet that she went through our entire supply of drying cloths moping it up. On the other hand, she was very focused on what she was doing, and new exactly what she needed to do to clean it up. Improvements from the start of the year.

Sunday, January 12, 2014

Montessori Sunday: Color Tablets

Welcome back to another Montessori Sunday, the educational part of the blog. Come on, I'm a teacher, there has to be more on here than just cute stories! Today I want to talk about the color tablets since they've been mentioned quite a bit on the blog lately.

The color tablets are part of the sensorial area in the classroom, specifically the sense of vision. I want to remind readers that the point of the sensorial materials is to teach children to refine their use of the senses. The materials isolate one property of the world (color in this case) so that is easier for the child to grasp the concept. Think about it this way, telling a child "this pencil is blue, and so the rug, and the sky, and this piece of paper. They are all blue." can be confusing as is might be difficult to notice what these various objects all have in common. With the color tablets everything is the same except for the color of the tablet, so it is easy for the child to differentiate.

There are actually 3 separate boxes of color tablets. Box 1 has pairs of the three primary colors: red, blue and yellow. Most children come in already knowing the language for colors and so they begin with the next box. Color box 2 also has pairs of tablets but has even more colors. This box is first presented as a simple matching activity which can be extended to matching at a distance, or matching with objects in the environment. The child is shown how to handle the tablets by the edges so as to not mar the colored part with fingerprints.

Color box 3 is the most complex and has an impressive 63 tablets in it. Unlike the first two boxes, the tablets are not paired, but rather graded. Each color has a progression of dark to light and the child is introduced to the idea of grading by the shade of the tablets. This is done first with just a single color at a time and the child works up to doing multiple colors. As a culminating event the child is shown how to make the 'sunburst'. The sunburst involves grading all the color tablets around a centralized object (usually a globe). I can say from personal experience that it is a daunting task to sort out and grade that many tablets. The children love the finished product though and it's pretty common to see them working in pairs to complete the sunburst.


Sunday, December 15, 2013

Montessori Sunday: Dressing Frames

 Snaps, zippers, buttons, velcro, buckles, laces, bows, safety pins, hooks and eyes, there's so many different ways to fasten clothing. The dressing frames in the Casa give children the opportunity to practice these different fasteners in a less awkward situation then on their own bodies. It's always easier to master a task when you can see what you're doing. This is the same reason it's pretty common to see children who are able to help their friends with a zipper, but still can't manage to do their own.

With all the dressing frames the Directress shows the child how to carry the frame with two hands to a table. Usually the snap frame is shown first, though buttons or a zipper may be introduced in the child is really interested. Using careful movements she slowly demonstrates how to undo the fastening. Carefully the two parts of the fabric are folded back, showing the table underneath. With the same careful and analyzed movements the teacher demonstrates how to fasten the pieces back together and invites the child to try. 

Sometimes with a more antsy individual the teacher may demonstrate only two or three fasteners before allowing them to have a turn, but part of what this lesson teaches is patience as well. Patiently waiting for ones turn for an activity is difficult but well worth learning.

The dressing frames are mainly used by the younger children in the class, though the lacing and bow tying frame aren't introduced until later. The bow tying frame is unique in that it may be broken down into two parts when introduced. The first part, the criss cross, can be learned pretty quickly, but the second part, tying the bows, takes a lot of perseverance. Because it's so difficult this is a presentation that we really want the child  motivated to learn before introducing it. Earlier this year we had one child who was very determined to learn how to tie a bow because he had new tie shoes. It only took about two weeks before he could do it independently. Throughout this time though he only took out the frame two or three times, all his other practice occurred using his outdoor shoes. It may have been easier to use the frame but his real intention was to be able to tie his shoes and that's what he focused on.

Sunday, December 1, 2013

Montessori Sunday: Puzzle Maps

Children love puzzles. So why do we insist on giving them puzzles of cartoon shaped animals and people? In a Montessori environment there are still puzzles, but they are more realistic than what you find in most toy stores. Many classrooms have puzzles of plants or animals where each distinct part of the animal (ex. the hind legs of a horse) is a separate piece. The geography puzzle maps follow the same concept, each different continent or country is its own piece of the puzzle.


The puzzle maps are introduced after the child has been shown the globe of the world, and introduced to the idea that the world is round and made up of land and water. The globe and world map are both brought to a working mat and together the teacher and child explore how they are similar and different. The teacher then demonstrates with clay how a round sphere can be flattened into the two circles that make up the puzzle. After demonstrating how to lift the pieces carefully using the knobs the child is encouraged to practice the puzzle on their own.

After mastering the world puzzle the child is introduced to the continent puzzles, which are more complicated due to the larger number of pieces. Additionally the child will be introduced to a puzzle map of their own country, which is divided into either states or regions. There are large, laminated control maps for the children to fit the pieces onto if they accidentally take out too many. These maps may be labeled with the names of the country/state or left blank.

Puzzle maps help children with their fine motor skills, spatial reasoning and introduce them in a concrete way to the world around them. In Montessori we work from the whole concept (the world) to the parts (the child's own country/state). This is to help them learn things within a context. It's hard to really understand what a continent is if you don't know that the world is made up of land and water. The children are introduced to the idea of geography though a material that they can see and manipulate. Other activities also branch off from the puzzles. Montessori classrooms have flags of different countries for children to learn about. Cultural folders share with them pictures from different parts of the globe.

Cool fact about the puzzle maps: the knob for each country is strategically placed where the capital of that country is located. How neat is that!

Sunday, November 17, 2013

Montessori Sunday: Number Rods

Introducing, the number rods. These pretty red and blue rods are the child's first formal introduction to numbers and counting. By the time most children get to this work they may already know how count by rote, maybe learned from songs, stories or just parental repetition. The number rods help them to associate the name of the number with an actual quantity.

The idea of quantity is reinforced by the fact that the sections of the rod are bound together. Rather than introducing the child to counting with say, shells, whose number name with fluctuate based on how many they grab, the number rod of 9 is always going to be 9 (barring the introduction of a power saw into the environment, but I think we can say that most likely will not happen). 

The child brings the rods to the mat and the Directress has him or her build them in order of length. This process should be relatively easy because the child has already had experience with building the red rods, which are identical (except for color). After arranging the number rods the teacher takes down the shortest rod and introduces it in the form of a three period lesson.

"This is the rod of 1." She demonstrates counting it, placing a finger on the rod while saying, "1." Next she brings down the rod of two and repeats the process, moving her finger from the red section to the blue when counting each new number. This is repeated for the rod of three and then the teacher begins to give fun little commands that have the child interact with the rods. Things like, "Tap the rod of one," "Give me the rod of 3," and so on. The child is introduced to all the rods this way, until they can identify them all through counting.

And this is just the initial presentation, there are lots of activities and extensions that help solidify the child's concept of quantity and their ability to count to ten. There are also small cards with the numbers 1 to 10 on them for the child to match to the rods when they can identify the written symbol for the numbers. 

One of the things that I think is coolest about the number rods though is that there is an actual activity with them is the introduction of the idea of addition and subtraction. Yes, that's right. In preschool we are not just teaching how to count, but introducing children to the operations of math. I know there's a lot of other toys/games/activities for young children that are supposed to teach counting and math, but most don't even attempt to claim to teach the operations, thinking young children aren't capable of it. However, thus far I've shown this to at least four different children and all of them have been fascinated by the idea of adding two numbers together and easily picked up on the idea of how to do it. Score one for well designed learning equipment!